Automating DFIR pipelines with OpenRelik
Rationale
In a previous blog post, I explored the potential of Velociraptor as a tool for acquiring artefacts, performing triage tasks from clients through the KAPE.Files artefact, and then processing them with Hayabusa and Plaso to generate Timelines and Supertimelines, with final import into Timesketch for collaborative visualisation and investigation. I was impressed by the power of these tools combined, but something was missing: automation. I thought that it would be enough to write specific VQL artefacts with additional Python or Bash scripts to connect everything, but it didn’t seem like the best solution. Then I discovered OpenRelik, and it was just what I was looking for to close the circle. OpenRelik is an open-source framework designed to automate Digital Forensics and Incident Response (DFIR) workflows. It streamlines evidence collection, timeline generation, and analysis tasks, enabling faster and more reliable investigations through customisable automation in a collaborative manner. Now I’ll show you what it can do.
In this tutorial, we will see how to install OpenRelik, add plugins, and run some test pipelines to explore its potential.
Install OpenRelik
To install OperRelik, simply follow the guide on the official website. It only takes a few simple steps. Obviously, Docker is a prerequisite and can be installed here.
Once Docker is installed, you can proceed with the installation:
cd <DIRECTORY_OF_YOUR CHOICE>
curl -s -O https://raw.githubusercontent.com/openrelik/openrelik-deploy/main/docker/install.sh
sudo bash install.sh
# Run the docker-compose inside openrelik folder
cd openrelik
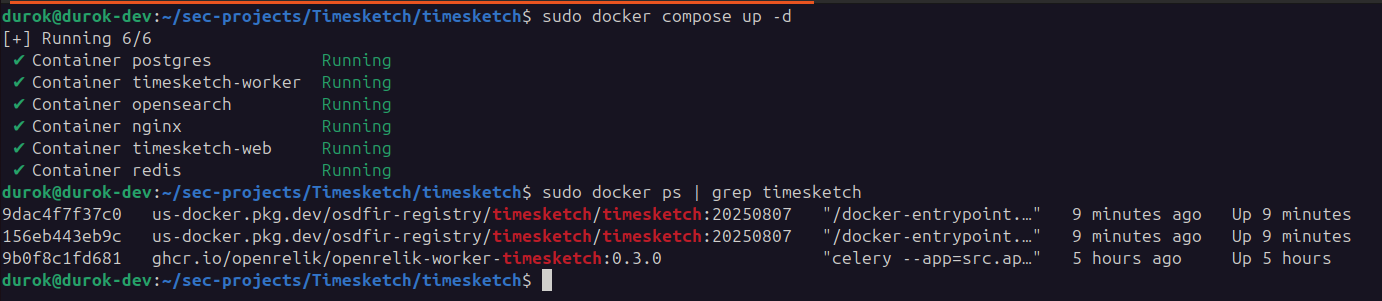
sudo docker compose up -d
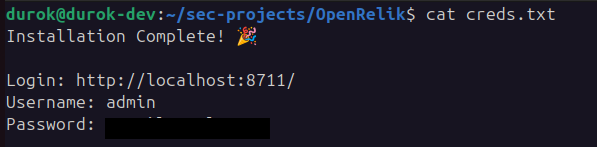
At the end of the installation, the admin credentials will be displayed on the screen. I recommend saving them in a file for this test.
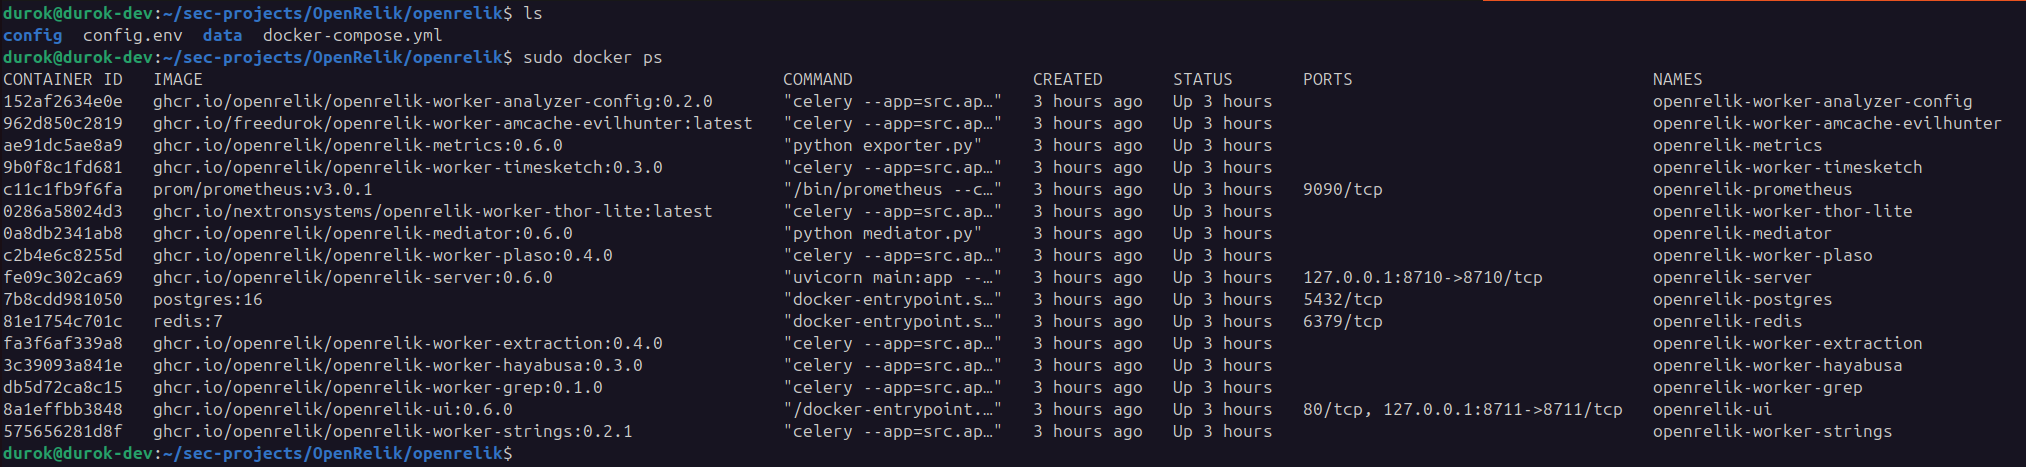
We can see that the script has created several folders, configuration files, and a docker-compose.yaml file. Once launched, these are the microservices running.
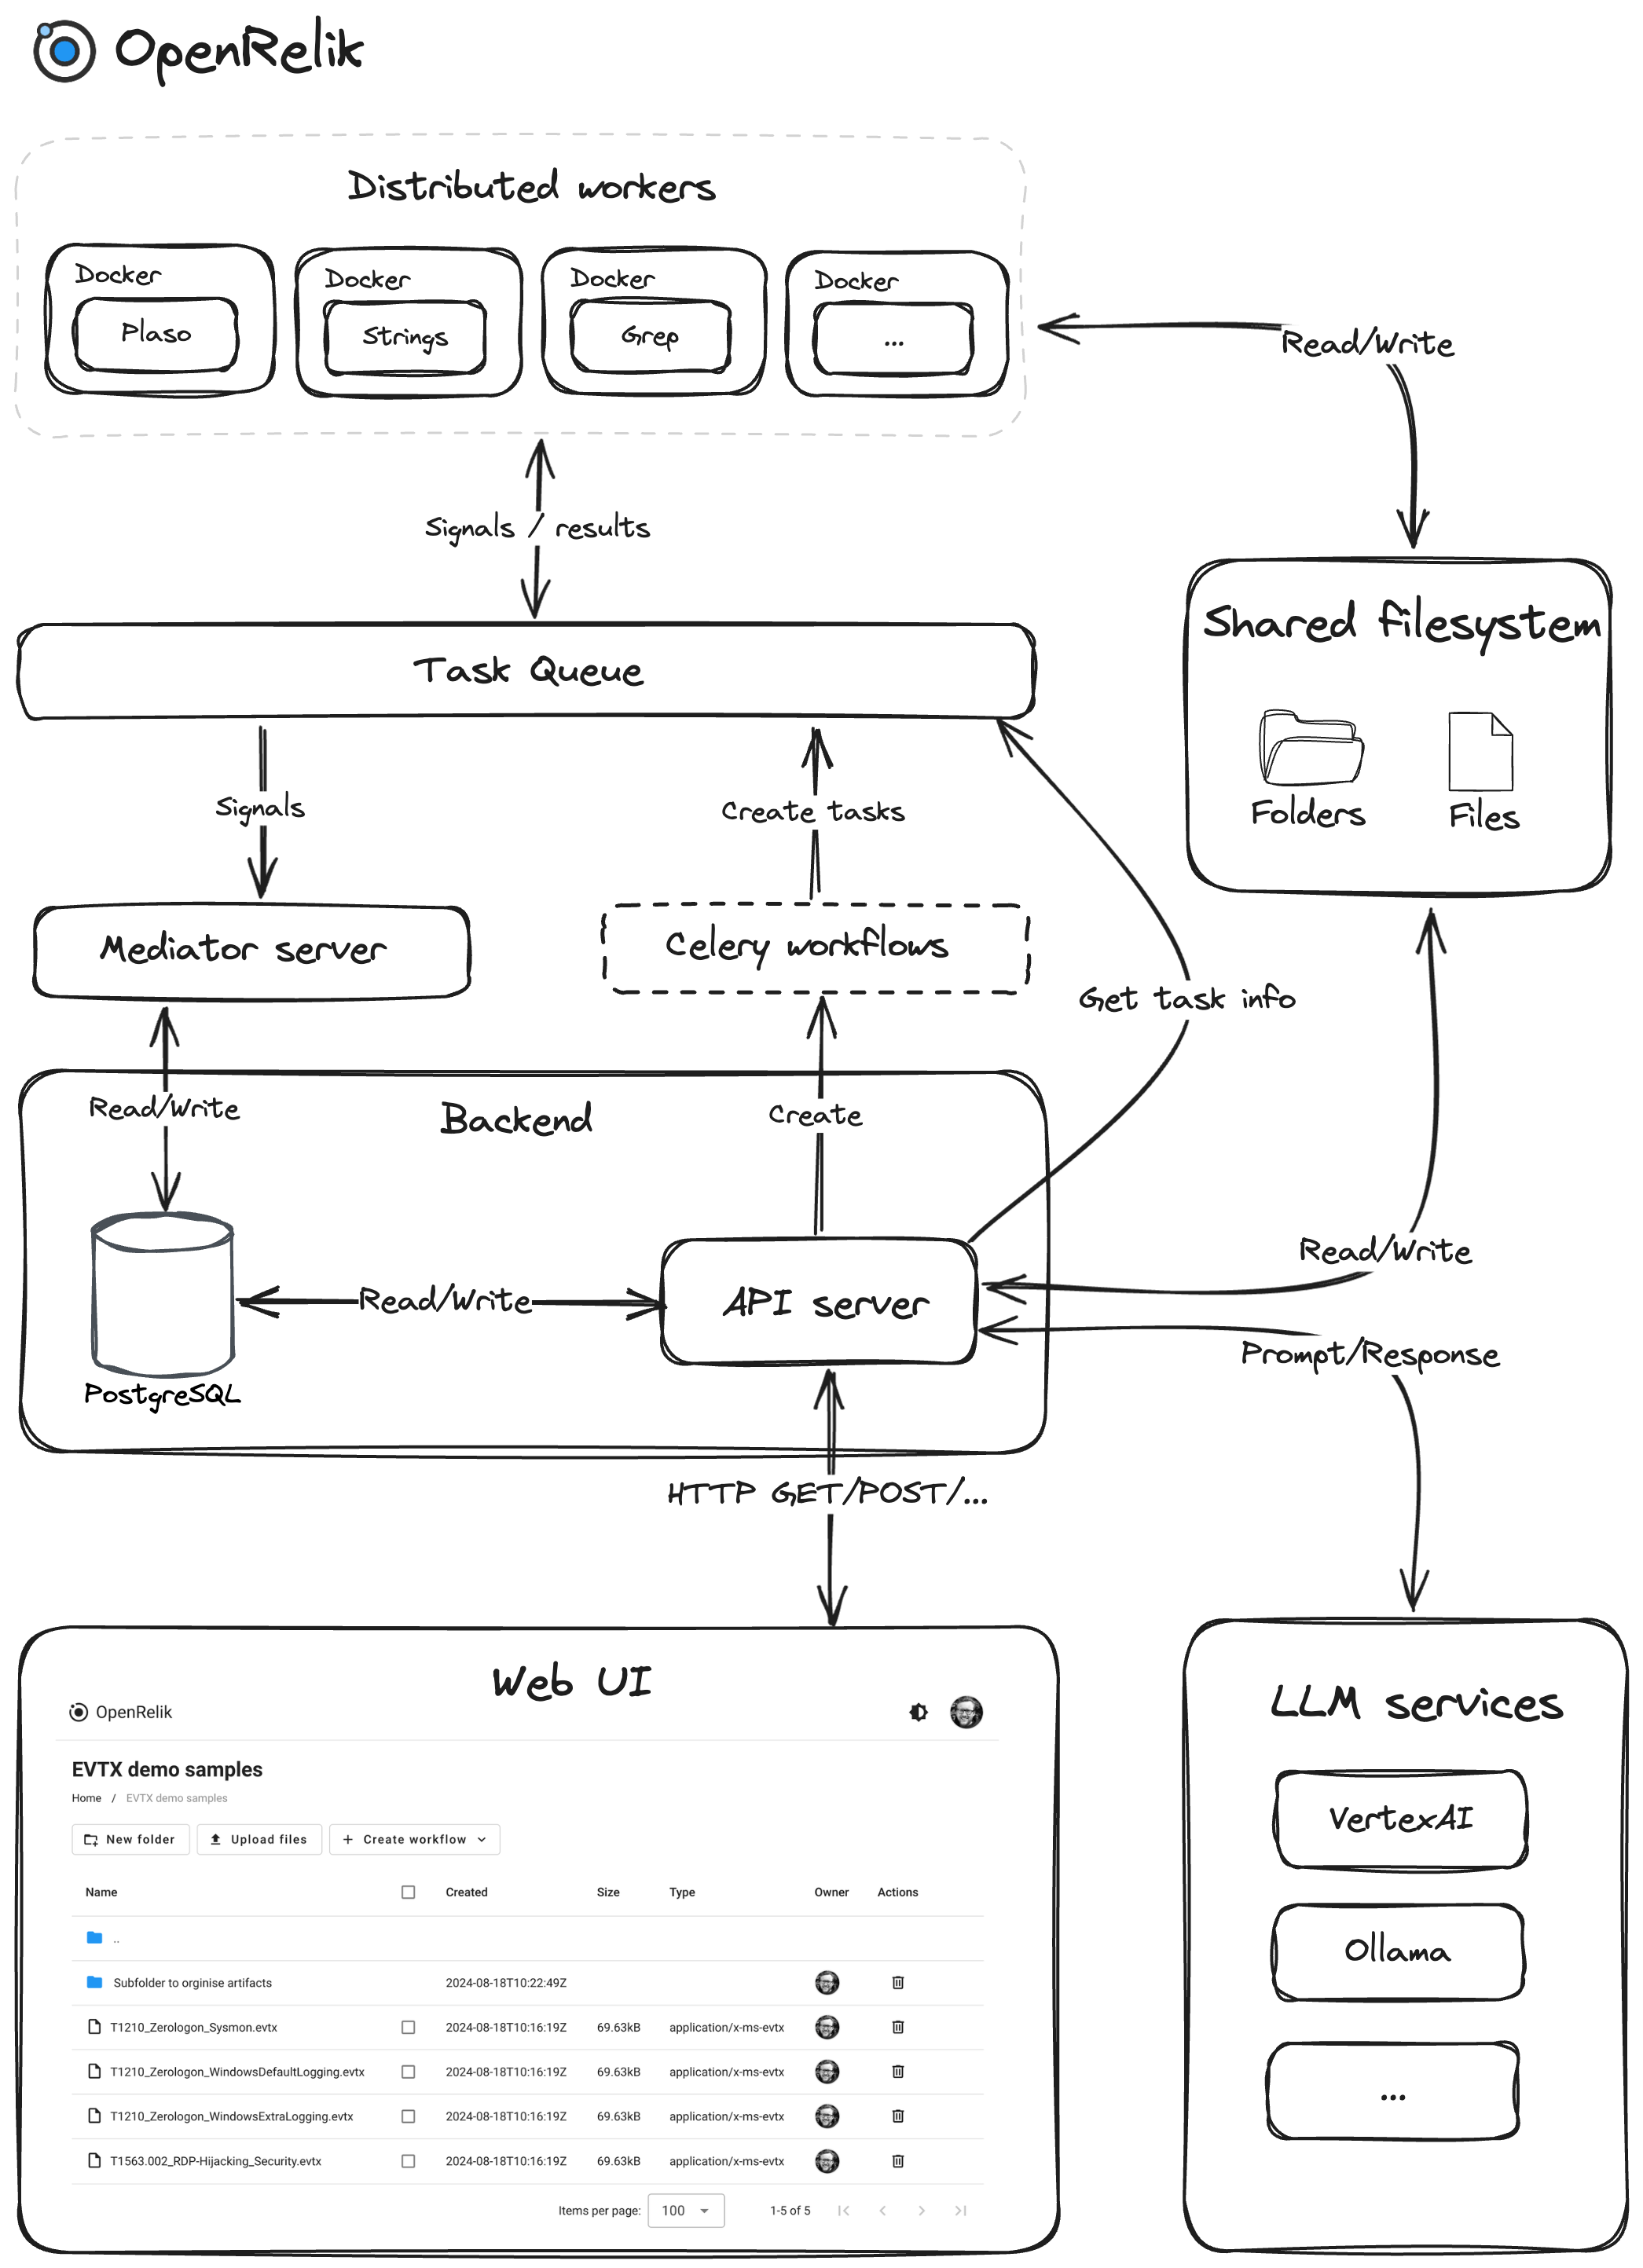
This is because the application architecture is based on a fleet of microservices that are orchestrated by a API Server, sorting all registered Celery tasks, as explained in their documentation. Here is an overview of the architecture:
Now we are ready to log in and start working.

How to add a OpenRelik Worker
To add workers to the architecture, and thus have new features available, i.e. new building blocks for our pipelines, you need to add the workers to OpenRelik’s docker-compose.yaml.
As this project is still very new, there are not many workers available, but the official website has a page dedicated to the Marketplace where several projects are already available.
In this tutorial, we will add three workers:
- Timesketch -> which allows you to import timelines to Timesketch, available on the marketplace.
- THOR Lite from Nextron Systems -> To scan files and directories for malicious content.
- AmCache-EvilHunter -> A worker integrates AmCache-EvilHunter by Cristian Souza (GitHub:
cristianzsh) to parse WindowsAmcache.hve, extract execution metadata (Program/File entries, SHA-1, timestamps), flag suspicious binaries, and optionally enrich via VirusTotal/Kaspersky OpenTIP. Outputs JSON/CSV plus a TXT log.
This last worker was developed by me using the template provided by OpenRelik, following the instructions in the repository and also drawing inspiration from other workers that had already been developed.
These are the three workers I added to docker-compose.yaml, as it is very intuitive and each repository provides instructions on how to add them, as per the template. Obviously, as you will see, it may be necessary to configure some environment variables.
# <INSTALLATION_DIR>/openrelik/docker-compose.yaml
# Timesketch importer worker
openrelik-worker-timesketch:
container_name: openrelik-worker-timesketch
image: ghcr.io/openrelik/openrelik-worker-timesketch:${OPENRELIK_WORKER_TIMESKETCH_VERSION}
restart: always
environment:
- REDIS_URL=redis://openrelik-redis:6379
- TIMESKETCH_SERVER_URL=http://timesketch-web:5000 # In my case i use localhost Timesketch instance for test
- TIMESKETCH_SERVER_PUBLIC_URL=http://127.0.0.1:5000 # In my case i use localhost Timesketch instance for test
- TIMESKETCH_USERNAME=openrelik
- TIMESKETCH_PASSWORD=[REDACTED]
volumes:
- ./data:/usr/share/openrelik/data
command: "celery --app=src.app worker --task-events --concurrency=1 --loglevel=INFO -Q openrelik-worker-timesketch"
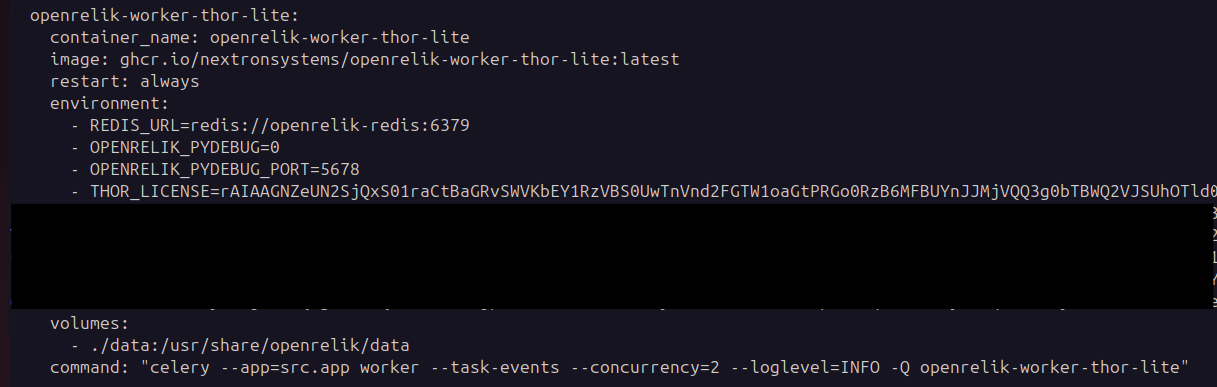
# THOR Lite scanner -
openrelik-worker-thor-lite:
container_name: openrelik-worker-thor-lite
image: ghcr.io/nextronsystems/openrelik-worker-thor-lite:latest
restart: always
environment:
- REDIS_URL=redis://openrelik-redis:6379
- OPENRELIK_PYDEBUG=0
- OPENRELIK_PYDEBUG_PORT=5678
- THOR_LICENSE=[REDACTED] # API Required, but it's free on their site
volumes:
- ./data:/usr/share/openrelik/data
command: "celery --app=src.app worker --task-events --concurrency=2 --loglevel=INFO -Q openrelik-worker-thor-lite"
# AmCache-EvilHunter worker
openrelik-worker-amcache-evilhunter:
container_name: openrelik-worker-amcache-evilhunter
image: ghcr.io/freedurok/openrelik-worker-amcache-evilhunter:latest
restart: always
environment:
- REDIS_URL=redis://openrelik-redis:6379
- OPENRELIK_PYDEBUG=0
- VT_API_KEY=[REDACTED] # VirusTotal API key
- OPENTIP_API_KEY=[REDACTED] # OPENTIP API key
volumes:
- ./data:/usr/share/openrelik/data
command: "celery --app=src.app worker --task-events --concurrency=4 --loglevel=INFO -Q openrelik-worker-amcache-evilhunter"
Once these dockers have been added, simply restart everything with sudo docker compose down && sudo docker compose up -d, and the new tasks will automatically be available in the pipelines .
Now we will see how to build workflows and execute them.
Using OpenRelik Workflows
Once logged in, we can see that the interface is simple and clean, with no tabs or menus with endless submenus of features. This is because the aim is to segment each investigation into a folder containing the evidence and process it through workflows with the tasks available provided by the services.
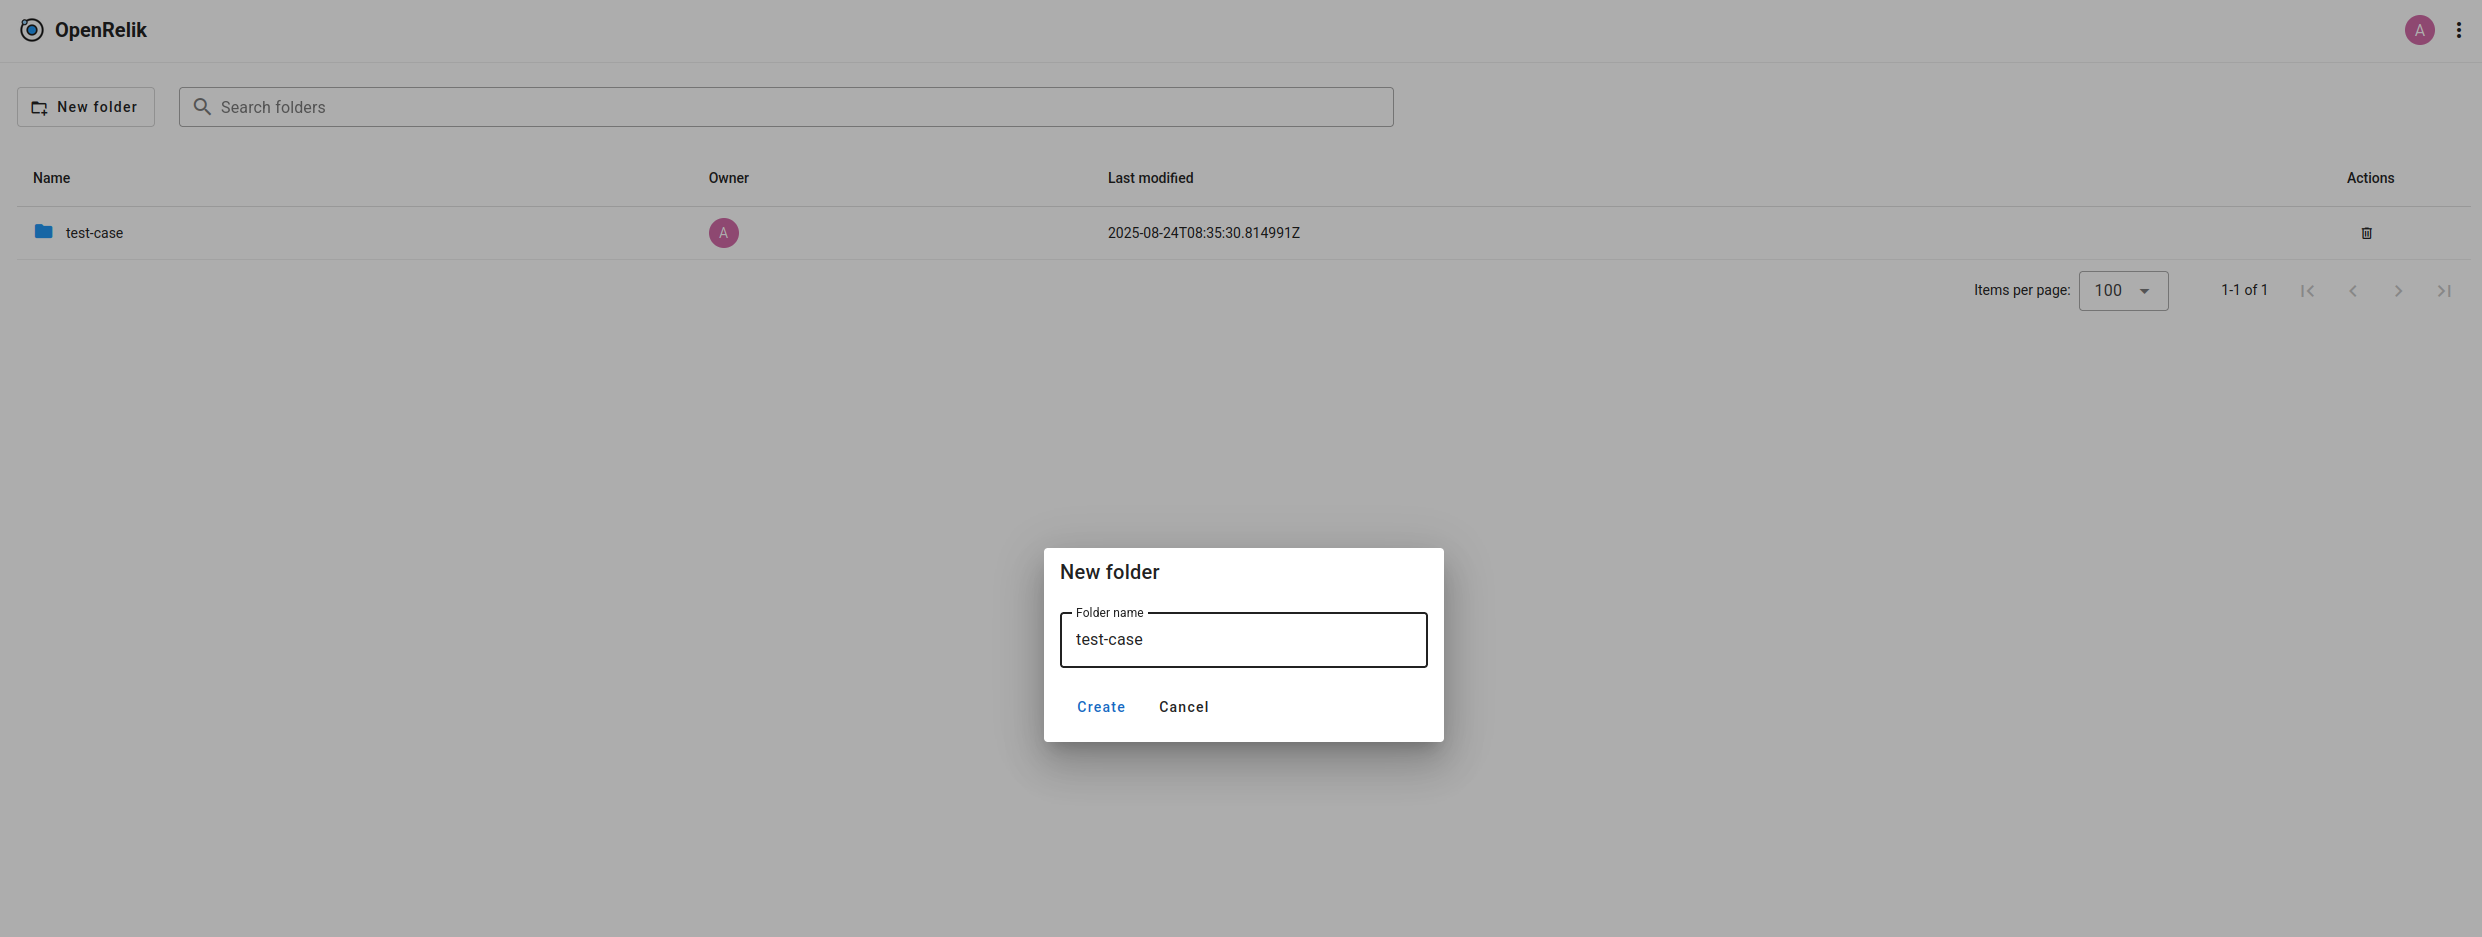
From here, we can upload our test evidence:
Plaso Workflow
In this example, we will see how to create an MFT timeline from a test image. Obviously, there will be no evidence, but it only serves to demonstrate the use of the application and its potential.
For this example, I will also use the timesketch importer, which is the worker that will allow me to ingest my timeline directly into my instance, which is obviously running locally, as we can see from the screen:
To enable communication between the OpenRelik instance and the Timesketch instance, as described in the worker guide, you need to connect to the network .
sudo docker network connect openrelik_default timesketch-web
In the video, I will show you how intuitive it is to create a workflow simply by adding tasks. This modularity opens up a universe of possibilities.
As we can see, the workflow began with the Plaso Log2Timeline task extracting and parsing the MFT, then passing the output (i.e. the .plaso file) to Plaso Psort, creating the .csv file, and simultaneously passing it asynchronously to the Timesketch Importer, which performed the ingest on my local instance of Timesketch.
Hayabusa Workflow
This time, we will create a sample workflow on some very common artefacts, Windows events in .evtx format. This workflow will use Hayabusa to generate a timeline that will be imported into Timesketch as in the previous example, and at the same time it will generate an HTML report of the scan.
We note that OpenRelik also has the ability to render HTML reports within its own UI. To do this, it is necessary to specify the data_type in the OpenRelik configuration file during worker installation. In the case of Hayabusa, as also suggested in their repository, simply add this configuration to the openrelik/setting.toml file.
[ui]
# data_types that will be rendered using unescaped HTML in a sandboxed iframe in the
# frontend UI.
allowed_data_types_preview = ["openrelik:hayabusa:html_report"]
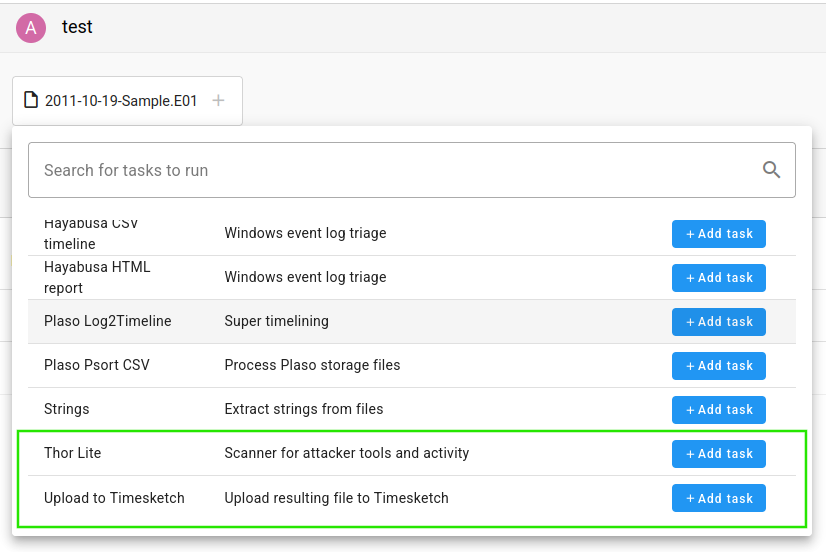
Thor Lite Workflow
In this example, we will see a simple workflow for extracting files from a disk, followed by scanning with THOR Lite. To use this worker, you need a free licence, which you can request on their website. Once obtained, simply enter it as a base64 environment variable in OpenRelik’s docker-compose.yaml, as suggested in their worker instructions.
At the same time, we will run strings on all files.
base64 -w0 file.lic
In addition to the licence, we will also need to add the data_type required to the openrelik/setting.toml file to enable the rendering of the HTML report.
[ui]
# data_types that will be rendered using unescaped HTML in a sandboxed iframe in the
# frontend UI.
allowed_data_types_preview = ["openrelik:hayabusa:html_report", "openrelik:worker:thor-lite:html_report"]
Let’s proceed with the demo:
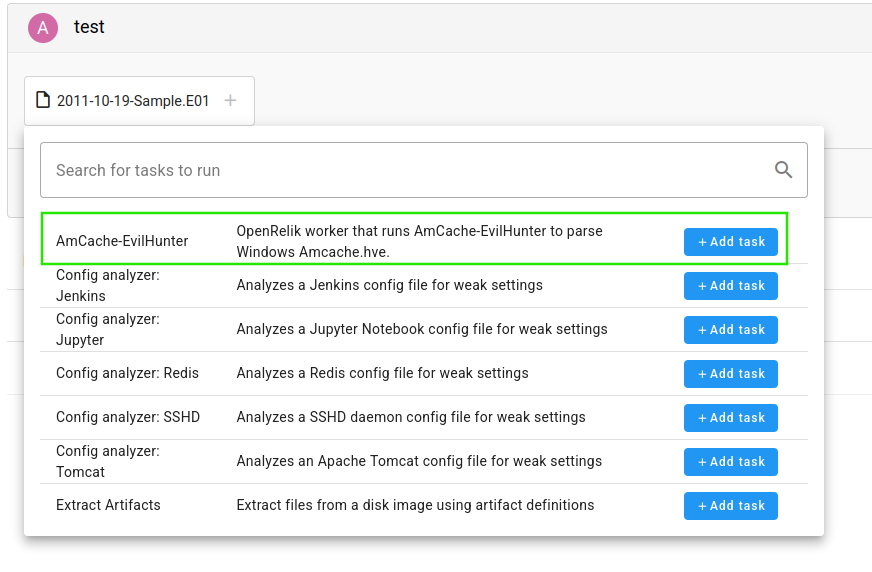
AmCache-EvilHunter Workflow
In this last example, we will test the worker I built to automate Cristian Souza’s tool, AmCache-EvilHunter.
This tool parses the AmCache.hve registry hive and extracts all information about executions occurred on the system. Furthermore, as it contains the SHA-1 of the executed files, it can also use external sources such as VirusTotal for enrichment. Obviously, to use the VirusTotal function, you need to obtain the API_Key by registering.
While developing this tool, I realised how easy it is to develop a docker for OpenRelik. The most important thing is to manage the options of the tool you want to wrap.
Let’s see the worker at work:
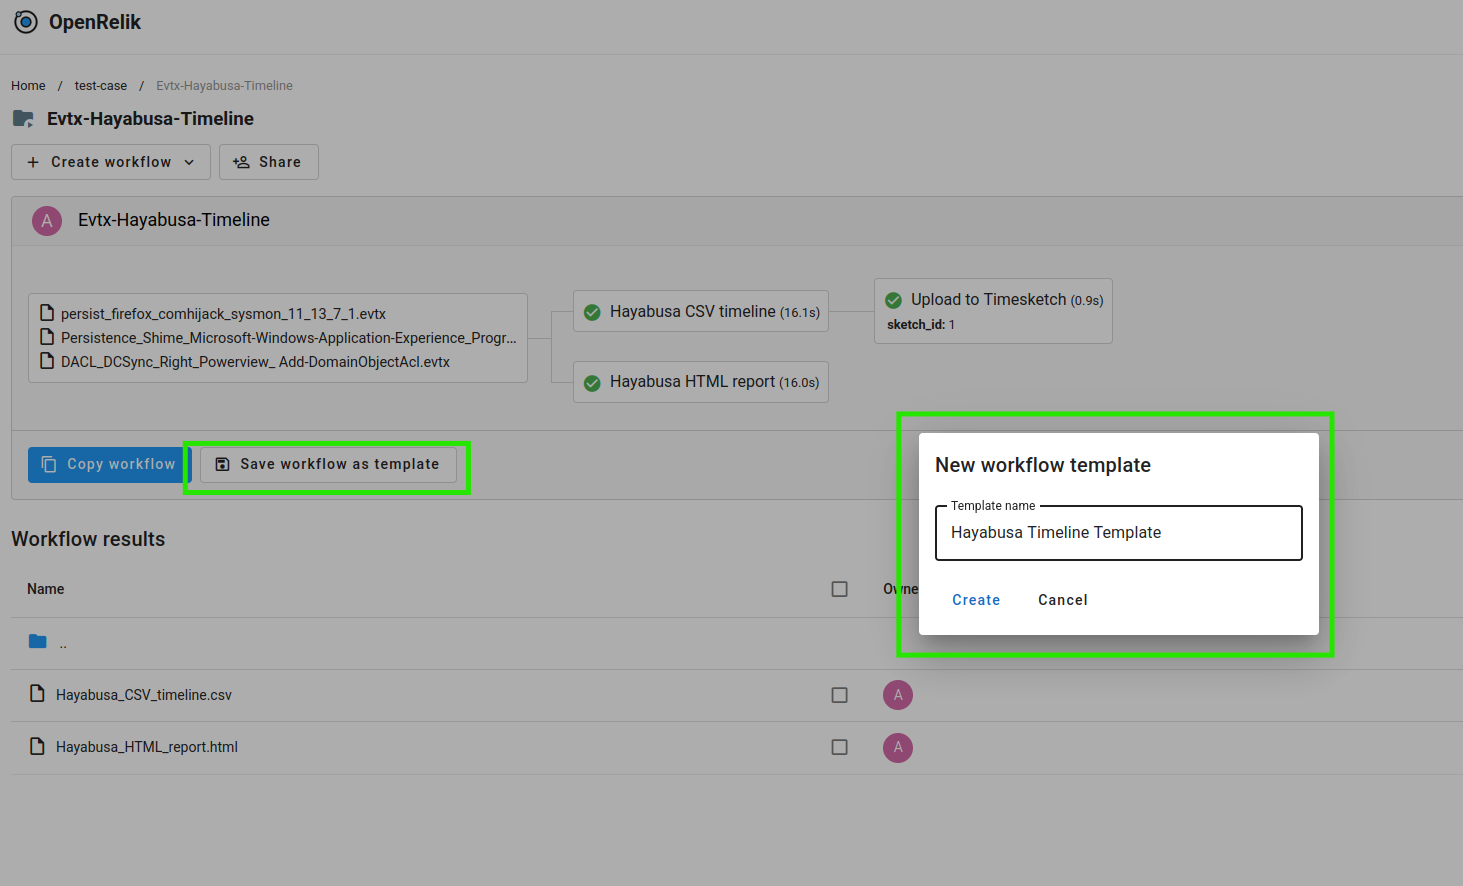
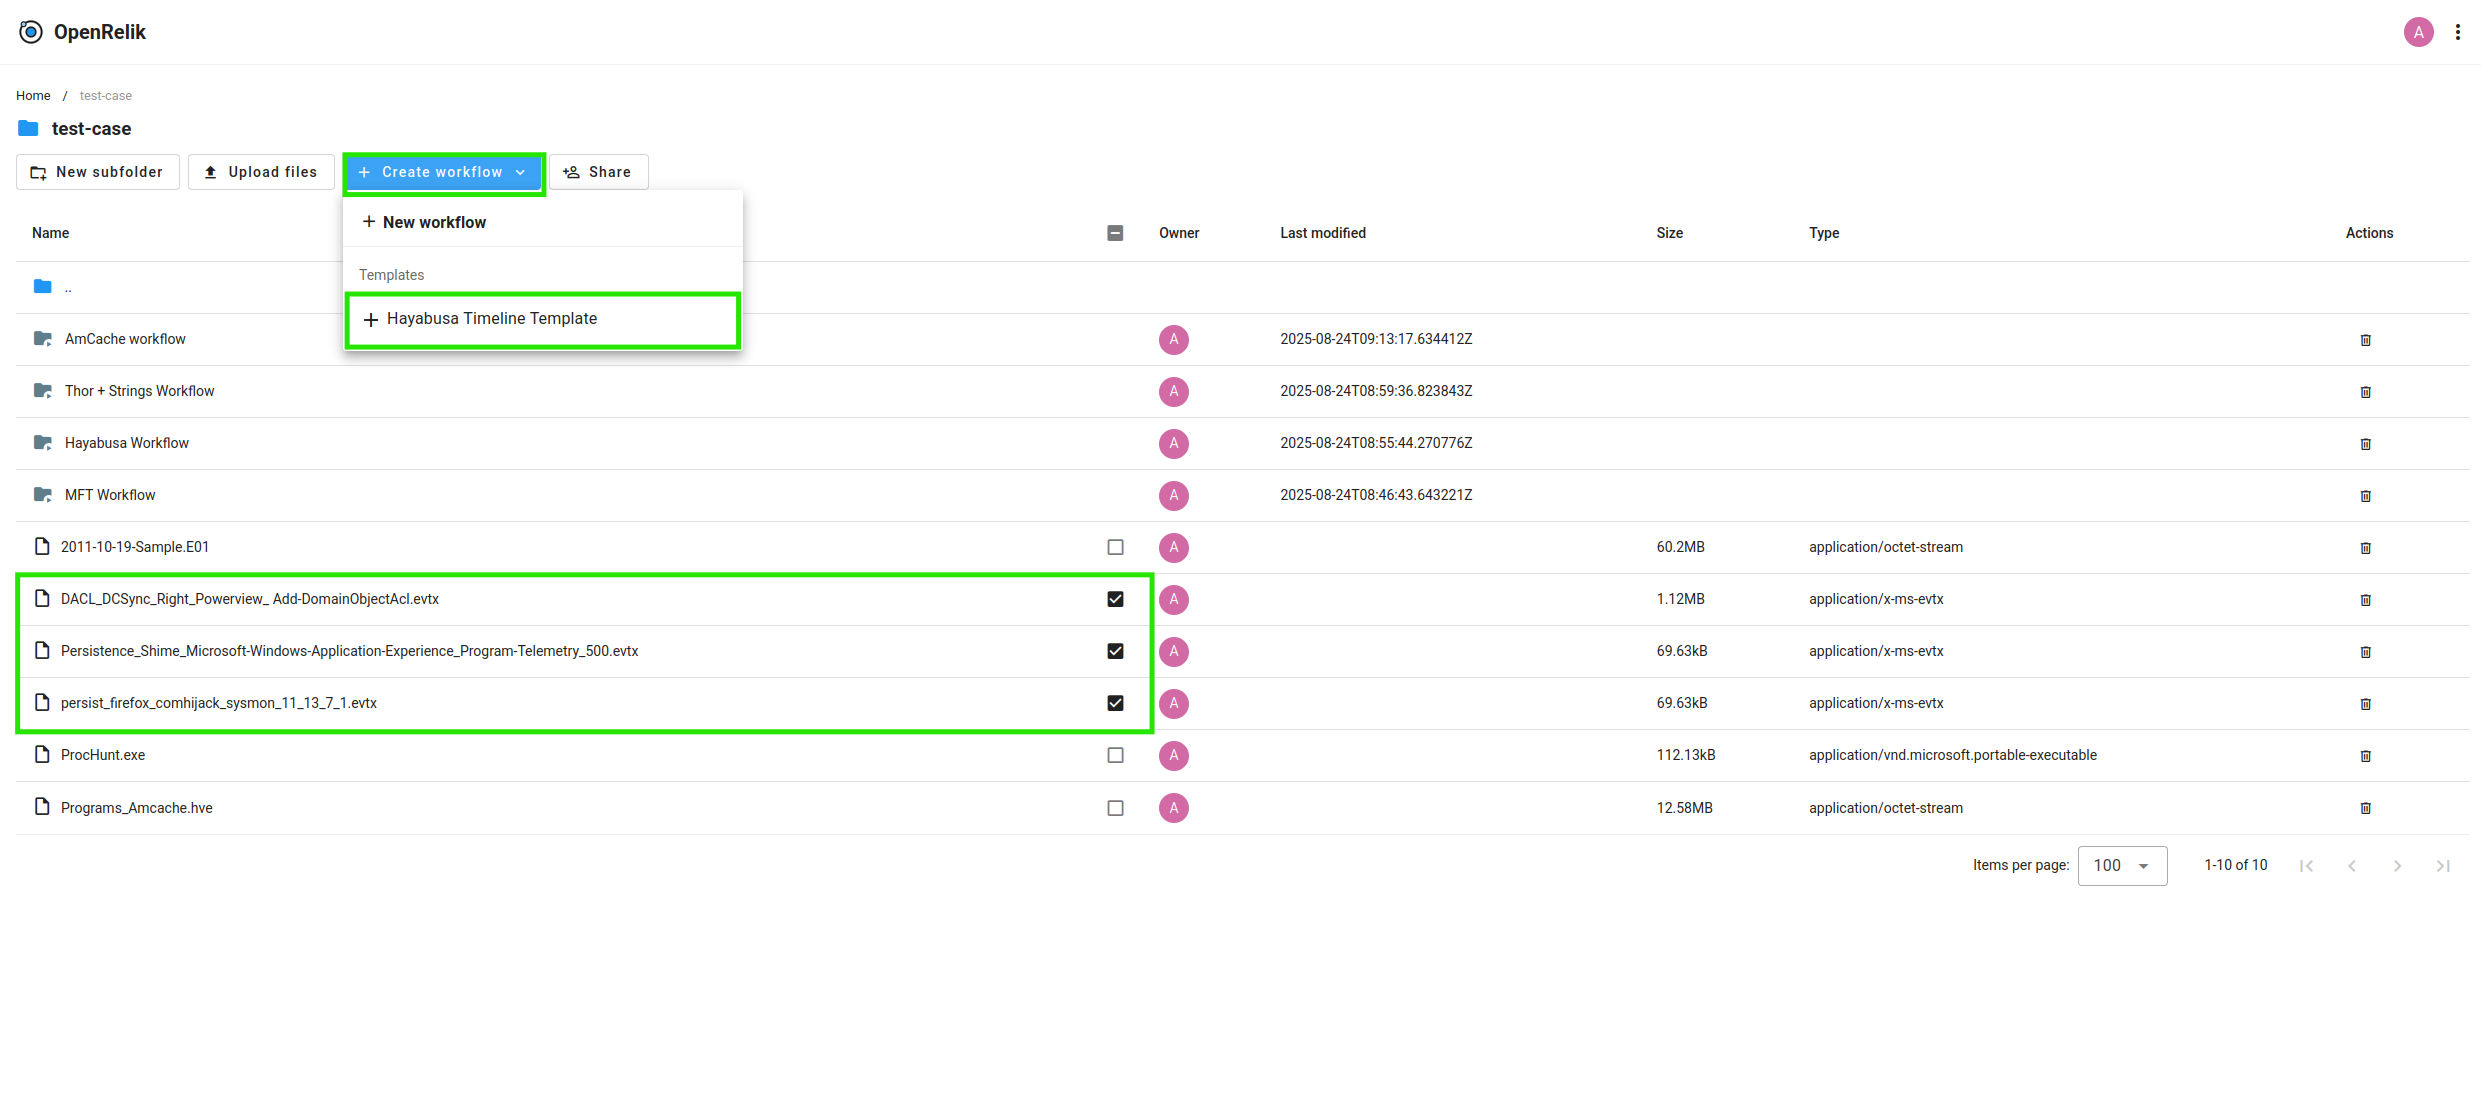
Creating a workflow template
In addition to creating workflows, you can also save them as templates for later reuse:
Conclusions
OpenRelik effectively closes the automation gap in DFIR by orchestrating heterogeneous tools into reproducible, auditable pipelines. In a few steps, we deployed the microservice stack, registered workers (Plaso/psort, Hayabusa, Timesketch importer, THOR Lite, AmCache-EvilHunter), and executed end-to-end timelines and scans with automatic artefact hand-offs and in-UI report previews.
Key gains: composable tasks, queue-based scaling (Celery), repeatability, and reduced analyst toil. The workflow model encourages standardisation (templates), provenance (per-folder evidence), and rapid iteration when adding new workers via the provided template.
Operational notes: some workers require licences/API keys; network bridging and allowed_data_types_preview must be configured; the ecosystem is young, so catalogue breadth and maturity will evolve.
Next steps worth exploring: parameterised templates for common cases, object storage for large artefacts, tighter Velociraptor ingestion, and auto-enrichment stages (YARA, AV, threat intel) before Timesketch import.
Bottom line: if you need reliable, repeatable DFIR at scale, OpenRelik provides a pragmatic, extensible control plane for your timelines and scans.